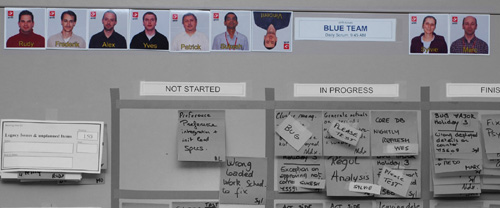
Putting team member pictures on the team taskboard is another good idea. This is particularly useful for large organizations that have many teams and lots of people.

Benefits of team pictures
- Helps create team identity (together with a team name) “This is who we are. We are the Blue Team and these are our members.”
- Helps you match faces to names when looking at the board, especially if you use nametags.
- Eliminates all uncertainty regarding who is in what team. People get one picture and can only belong to one team.
- Helps find people in large offices. “You have to talk to Susan from the green team. You can see her picture on their board”.
- Changing teams, or going on loan to another team for a Sprint, is as easy as moving your picture and nametags from one board to another.
- We turn around a picture to indicate that the person is not present today. This helps you not lose time looking for people that aren’t there.
- We also put cell phone numbers of team members on the back of their picture. No more going crazy trying to find the number of Johnny!
We also use team pictures to do literal “team building” exercises. Every now and then you might want to reshuffle and reorganize the teams. You can take all pictures into a meeting room with a clean whiteboard and brainstorm how new teams would look like. This is a highly visual way of “seeing” and “building” a large team that has to be divided in sub-teams.
Visual Team Building exercise
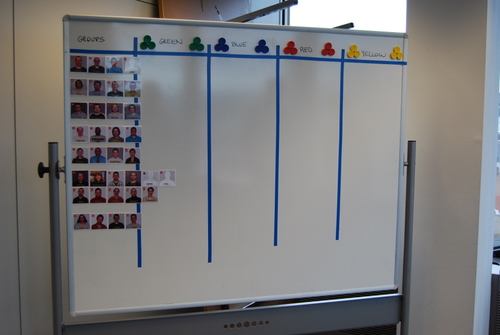
In the pictures below you can see such an exercise with a team of 35 people. We did this when going from component teams to feature teams. In this case, people were pre-divided into groups (based on specialization, domain knowledge, etc). People from each group were not supposed to end up in the same team (this was a way of ensuring cross-functionality and cross-pollination). Asides from that restriction, people were free to self-organize and choose the team they wanted to be in. Based on the number of people, we wanted to create 4 sub-teams. I set up the board like this:

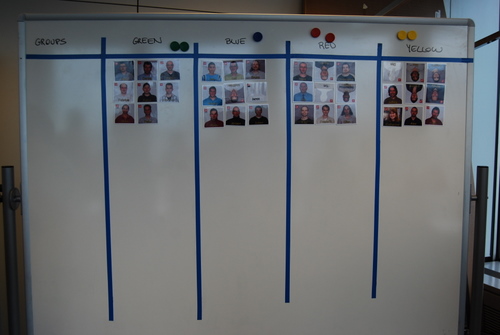
The result after the exercise was finished:

Using pictures allows you to “see” how the teams will look like. Moving the pictures around is very easy and allows you to visualize different team configurations. The visual effect is very strong here.
How I make the team pictures
I go through the effort of making high quality team pictures because they look good and last forever.
 I take a decent picture of the person, crop it to a 750×750 pixel square, and insert their picture into a Photoshop template I made (available on request) with the logo of the company and the name of the person. Then I print it in glossy photo paper and plastify it (you can fit 12 pictures per A4 sheet). I cut the pictures out and finally I stick a piece of thin magnet to the back. The result is really good and sturdy, hard to explain in writing but the pictures look great, are solid and stick well to whiteboards. Many people ask for them as a souvenir when they leave the team!
Some people joke that they look like mugshots, and they’re right :). But they don’t have to, you can take a nice picture with a blurry background too, if you have the required photographic skills and equipment (a reflex camera and a zoom or fast lens). There’s an example of my friend Katie with a blurry office background in the “Elements of Taskboard Design” page.
Footnotes & Credits
I got this idea from the table tennis world. Specifically, from TTC Rooigem in Gent (where I live). First I did it for my ping pong club and then when I saw the result I thought “Hey, this would look great on my Scrumboards!”. Sure enough, it was an immediate hit… once people got past the embarassment of having their picture taken!
You must be logged in to post a comment.

3 comments
Comments feed for this article
Trackback link: http://www.xqa.com.ar/visualmanagement/2009/04/team-pictures/trackback/